Why Great Photos Matter
The realism of your virtually staged image depends entirely on the quality of the base photograph.
Even the most advanced AI — like the one powering StageVirtually — can only build on what it’s given.
A crisp, well-lit, correctly framed photo allows the algorithm to calculate accurate lighting, perspective, and proportions — the three pillars of photorealism.
The better your photo, the more natural and convincing your final staged image will look.
You don’t need to be a professional photographer. You just need to follow a few key principles used by top property photographers every day.
1️⃣ Lighting Is Everything
Lighting is the single most important factor in both real and virtual photography.
Natural light brings clarity, accurate colour, and depth — all of which help our AI generate perfect results.
Use Natural Light Wherever Possible
- Shoot during the daytime.
- Open curtains and blinds fully to maximise daylight.
- Avoid shooting at dawn or dusk — mid-morning to early afternoon is ideal.
Natural light ensures soft shadows and balanced tones, making the AI’s staging appear seamlessly integrated.
Turn On All Interior Lights
Artificial light complements natural light, brightening dark corners and balancing exposure.
Turn on every ceiling fixture, lamp, and wall light. Even small lamps make a big difference in softening shadows.
Avoid Harsh Shadows
A bright, sunny day can seem ideal but often creates high-contrast shadows that distort colour.
An overcast day is perfect — diffuse light wraps around the room evenly, eliminating harsh contrasts and blown-out highlights.
Pro Tip:
If sunlight is streaming directly through a window, try closing a sheer curtain to soften the glare.
2️⃣ Get the Right Angle and Height
A perfect virtual staging starts with a properly composed image.
The right angle gives the viewer a natural, spatially accurate perspective of the room.
Shoot From a Corner
- Position yourself diagonally to capture as much of the room as possible.
- Corner shots naturally show depth and scale — letting viewers see at least two walls, the floor, and ceiling.
- Avoid standing flat against a wall, which flattens perspective and makes the room look smaller.
Keep the Camera at Eye Level
- Ideal camera height: 4–5 feet (1.2–1.5 m) from the floor.
- Too low exaggerates furniture height; too high distorts ceiling lines.
- A consistent, eye-level height mimics how people actually see the room.
Keep the Camera Straight
- Ensure your camera lens is level — not tilted up or down.
- Vertical lines (door frames, corners, window edges) should stay parallel with the image’s sides.
- A tilted shot confuses the AI’s geometry detection and can make walls appear to lean.
Pro Tip:
Use your smartphone’s grid lines or a tripod to help keep everything perfectly aligned.
3️⃣ Technical Specifications That Make a Difference
Even small adjustments in camera settings can dramatically affect final results.
Here’s what to pay attention to before pressing the shutter.
High Resolution Is Essential
Always shoot using the highest resolution available on your camera or smartphone.
A high-resolution photo retains fine detail in flooring, texture, and lighting gradients — all of which our AI reads to ensure realistic staging.
- On smartphones: set camera quality to “High Efficiency” or “Max Resolution.”
- On digital cameras: use at least 12 MP or higher.
Use a Wide-Angle Lens — But Not Too Wide
A wide-angle lens helps capture the full breadth of the room, including more floor and ceiling, which creates a sense of spaciousness.
However, avoid ultra-wide or “fisheye” lenses.
These cause curved walls and warped perspectives that look unnatural once staged.
- Standard smartphone lenses (0.6× to 0.8×) are usually perfect.
- Avoid 0.5× or lower unless you’re in a very tight space and need it.
File Format and Delivery
- JPEG (.jpg) is ideal — it offers excellent quality without unnecessary file size.
- Avoid heavily compressed or filtered images (no HDR filters, beauty modes, or Instagram edits).
- Send files directly, not via messaging apps, which often reduce resolution.
Pro Tip:
If you’re uploading via email or a web form, check that your photo hasn’t been auto-compressed.
StageVirtually accepts large files easily — high quality always wins.
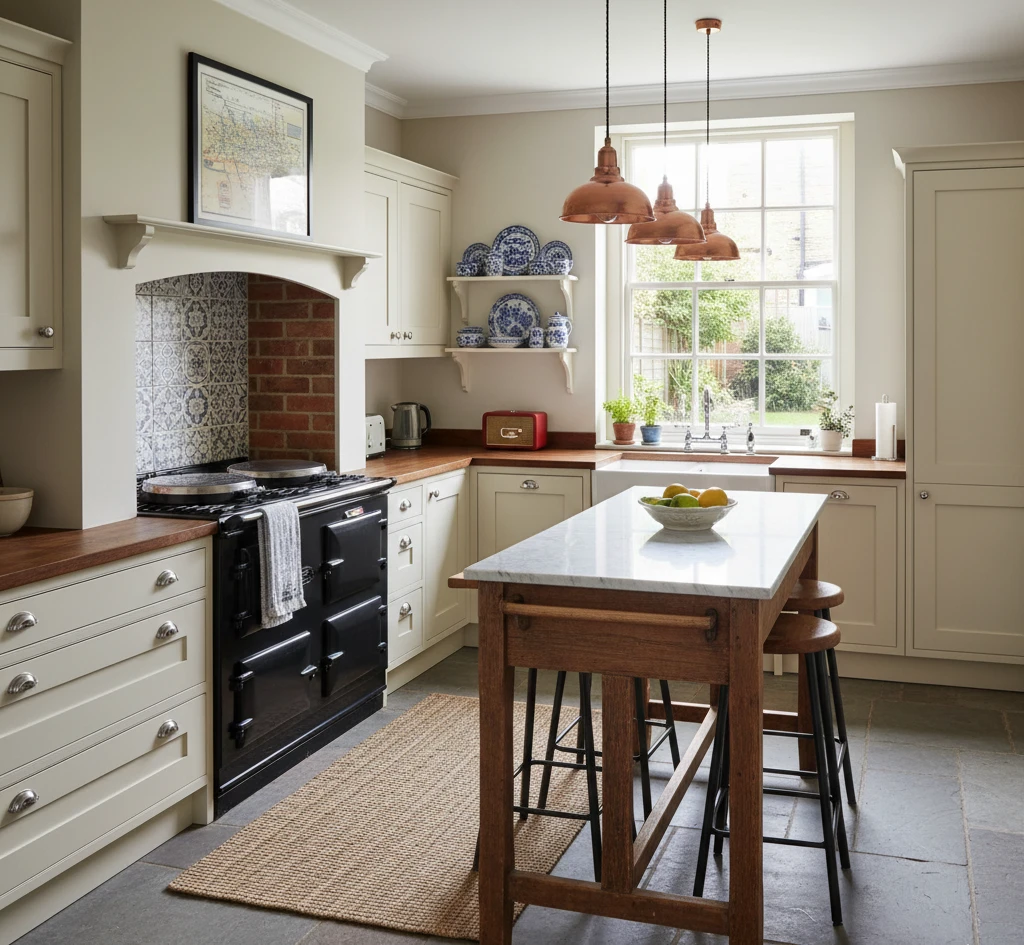
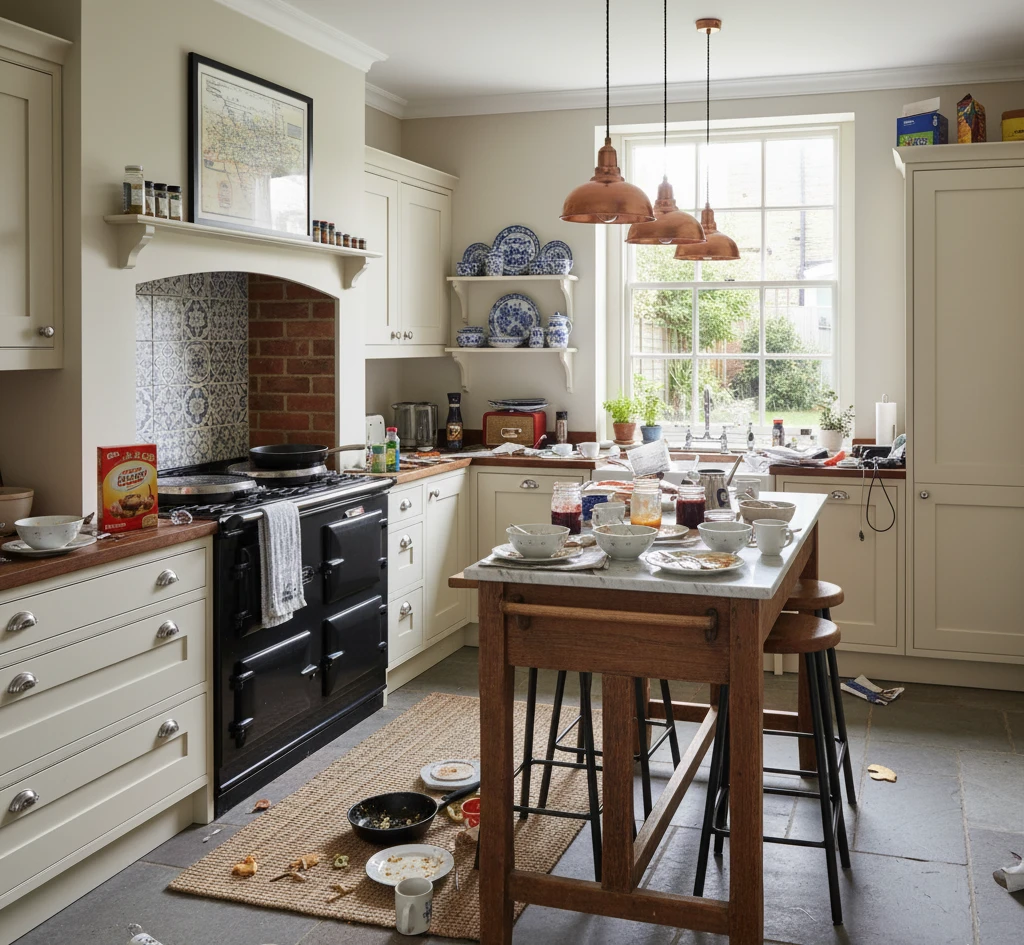
4️⃣ Clear the Space Before Shooting
The cleaner the base photo, the more flexible and realistic the final staging will be.
Remove Obstructions
- Take out personal items, clutter, or moveable furniture where possible.
- Keep surfaces like floors, counters, and windowsills clear.
Even a few objects — a chair leg or stray box — can limit furniture placement options for the AI.
If you can’t fully clear a room, StageVirtually also offers item removal as an optional pre-staging step.
Keep People and Pets Out of Frame
Virtual staging is meant to highlight the space, not the current occupants.
Any person, pet, or reflection in mirrors or glass can interfere with AI mapping.
Double-check that the room appears entirely vacant in every shot.
Close Unnecessary Doors
Open doors create visual clutter.
Keep doors closed unless they reveal a key adjoining feature, such as a kitchen, garden, or ensuite.
5️⃣ Capture Multiple Angles (Optional but Powerful)
If time allows, photograph each room from two slightly different corners.
Having multiple perspectives helps the staging AI interpret dimensions more accurately and gives you flexibility in choosing which shot looks best post-staging.
For larger spaces — such as open-plan living areas — capturing both the wide overview and a closer, detail-focused angle provides variety for marketing materials later.
6️⃣ Avoid These Common Mistakes
Certain errors can make even high-end staging appear artificial.
Avoid these pitfalls to ensure flawless results.
| Mistake | Why It’s a Problem | How to Fix It |
|---|---|---|
| Blurry or Out-of-Focus Photos | AI can’t detect sharp edges or depth correctly. | Use autofocus and hold steady, or use a tripod. |
| Extreme Brightness / Darkness | Loss of detail in bright windows or dark corners. | Use balanced exposure; let natural light dominate. |
| Heavy Filters or HDR Effects | Artificial colours or contrast confuse the AI’s tone mapping. | Always shoot in normal mode with true-to-life colours. |
| Furniture in the Shot | Limits placement of virtual items and can cause overlaps. | Remove or request item removal before staging. |
| Low-Resolution Uploads | Pixelation reduces realism and texture detail. | Use full-resolution files, minimum 2000 px width. |
7️⃣ Framing Tips for Different Room Types
Each room type benefits from slightly different framing strategies.
Living Rooms
- Shoot diagonally from one corner to show both seating and windows.
- Ensure natural light from windows doesn’t overexpose the image.
- Include a visible doorway or passage to show flow.
Bedrooms
- Photograph from the foot of the bed space looking toward windows or doors.
- Avoid tight cropping — leave enough empty floor space for visual balance.
- Keep wardrobe doors closed.
Kitchens
- Angle to include both counters and open floor area.
- Ensure overhead lights are on for clean highlights.
- Wipe glossy surfaces to remove reflections.
Bathrooms
- Use the widest lens available.
- Avoid showing yourself or camera reflections in mirrors.
- Close toilet lids and clear toiletries.
Hallways / Entrances
- Frame from one end looking toward a doorway or natural light source.
- These shots are perfect for creating a sense of “welcome” in virtual staging.
8️⃣ StageVirtually’s AI — Why Input Quality Matters
Our AI engine analyses thousands of micro-details in every pixel:
- Edge contrast (to understand room geometry)
- Light falloff (to determine natural vs artificial light)
- Shadow direction and intensity
- Colour balance for accurate tone matching
When your input photo is sharp, bright, and well-aligned, the system can simulate depth and texture flawlessly.
That’s what makes StageVirtually results indistinguishable from real photography.
9️⃣ Bonus Tip — Timing and Consistency
If you’re photographing multiple rooms, keep consistency across them:
- Shoot all on the same day, under similar lighting conditions.
- Maintain the same exposure and white balance settings.
- This ensures the final set of staged images looks cohesive — perfect for brochures, websites, and portals.
10️⃣ Using Smartphones — You Already Have What You Need
Modern smartphones are more than capable of professional-quality real estate photos.
Quick Setup Guide
- Clean your lens — smudges cause haze.
- Enable grid lines to keep lines straight.
- Tap to focus and slightly lower brightness if windows are too bright.
- Use both hands or a small tripod for stability.
- Avoid zooming in digitally — step closer instead.
When to Use Pro Mode
If your device supports it, enable “Pro” or “Manual” mode and set:
- ISO around 100–200 for crisp detail.
- Shutter speed 1/60 – 1/125.
- White balance near Daylight (5500K).
These settings yield clean, natural images that our AI processes beautifully.
11️⃣ Preparing Exteriors (Optional but Valuable)
Virtual staging isn’t just for interiors.
High-quality exterior photos can also be enhanced — adding blue skies, green lawns, or soft twilight effects.
Tips
- Shoot with the sun behind you to avoid lens flare.
- Include some sky but not too much — roughly 1/3 of the frame.
- Capture the property straight-on for symmetry.
StageVirtually’s AI can enhance skies and greenery automatically, so a clean, balanced exterior photo will yield excellent results.
12️⃣ Uploading to StageVirtually
When you’re ready to upload:
- Select the clearest, best-lit version of each room.
- Choose your preferred design style (e.g., Modern, Scandinavian, Classic).
- Our AI handles the rest — delivering high-resolution, photorealistic staging in under one minute per image.
No special file preparation needed — just follow the photo principles in this guide for flawless outcomes.
13️⃣ Quick Reference Checklist
Before Shooting:
- Clear the room
- Open blinds and turn on lights
- Set camera at eye level
- Use grid lines to keep verticals straight
- Avoid zoom or tilt
- Check focus
- Capture at least two angles
After Shooting:
- Review for brightness and sharpness
- Delete duplicates or blurry shots
- Upload full-resolution files (JPEG format)
This checklist takes just a few minutes to follow — but it makes all the difference in final quality.
Why Attention to Detail Pays Off
Every minute spent perfecting your input photo saves hours of editing and ensures a result that truly impresses buyers.
With good lighting, correct angles, and clean composition, StageVirtually’s AI can create renders so realistic they blend seamlessly with professional photography.
Agents consistently report that listings using well-prepared, staged images:
- Attract more portal clicks
- Receive more viewing enquiries
- Sell significantly faster
And all of that begins with one simple step — capturing a great original photograph.
Final Word — The Foundation of Photorealism
Virtual staging transforms listings, but it’s only as strong as its source material.
A sharp, well-lit, properly framed photo gives the AI everything it needs to deliver stunning, lifelike interiors.
🏆 Power Your Staging With StageVirtually.com
- AI renders in < 1 minute per image
- From £1 / $1 per photo
- Photorealistic results from your well-prepared shots
- Perfect for UK homes and property professionals
Capture smart, upload once, and watch your property marketing transform.
Try StageVirtually — because every great sale starts with a great photo.